SentinelOne is our cybersecurity (antivirus and ransomware) protection platform as of July 2023.
Santa Clara University is making available a basic version of SentinelOne for free to current students as well as faculty and staff home (personally owned) computers.
Windows Computers
1. You should uninstall any antivirus product you have installed on your computer before installing SentinelOne. Typical products you have might have installed include:
2. Download the SentinelOne installer. You will be prompted for your SCU ID. (If you are using Google Chrome and nothing downloads, try using FireFox instead.)
3. Unzip the file after the download is complete. Right click on the "Windows" folder (Windows.zip) and choose Extract all...
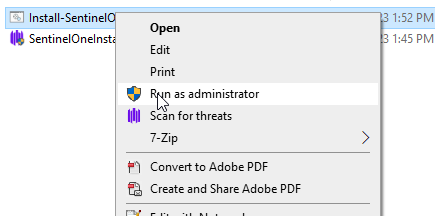
4. Open the folder and right-click the "RUN-ME.bat" file and choose Run as administrator....
5. The SentinelOne agent will install on your computer.
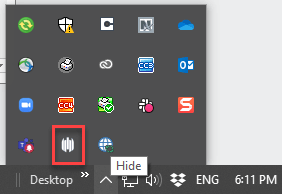
You can verify SentinelOne is running on your Windows computer by checking the Windows taskbar in the lower right corner.
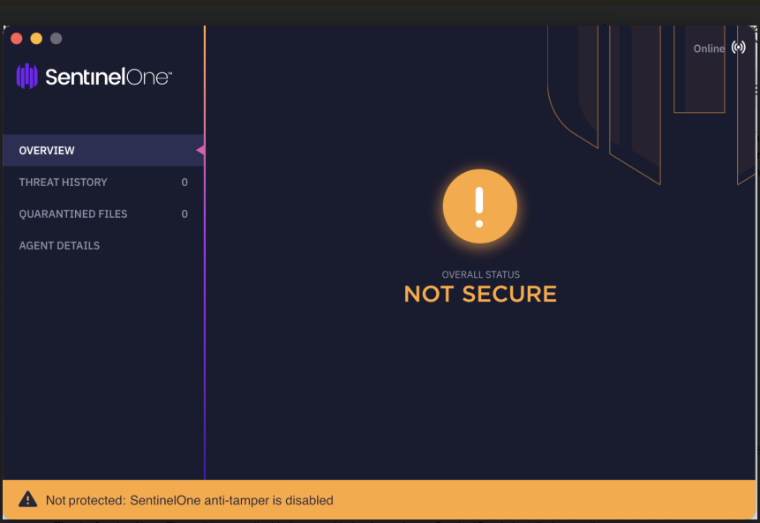
NOTE - it is normal for the agent to have a yellow dot and to show Not protected: SentinelOne anti-tamper is disabled. This configuration is necessary so the agent can be uninstalled from personal computers.
Additional Steps
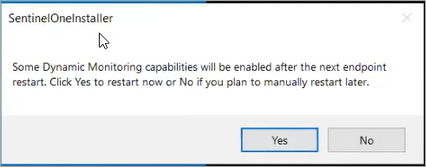
Once the SentinelOne agent is installed, your computer is protected from malware threats. However, a reboot is usually needed to activate all of SentinelOne's scanning abilities. If you see the message / notification from SentinelOne, you should restart your computer when possible.
macOS Computers
1. You should uninstall any antivirus product you have installed on your computer before installing SentinelOne. Typical products you may have installed include:
2. Download the SentinelOne agent for macOS. You will be prompted for your SCU ID. (If you are using Google Chrome and nothing downloads, try using FireFox instead.)
3. Unzip the file once it's downloaded. If macOS doesn't automatically unzip the file, click on it in "Downloads" and it should unzip.
4. Open the folder and run the "Sentinel-Release..." PKG file to install SentinelOne, following the prompts.
You can verify SentinelOne is running on your macOS computer by checking the macOS Command Center/notification area in the upper right corner.
NOTE - it is normal for the agent to have a yellow dot and to show Not protected: SentinelOne anti-tamper is disabled. This configuration is necessary so the agent can be uninstalled from personal computers.
Additional Steps
Authorizing Full Disk Access
If the SentinelOne icon shows "Needs user attention" or these messages "Authorize Full-Disk-Access to SentinelOne in System Preferences", "Authorize SentinelOne components in System Preferences". Approve Full Disk Access for SentinelOne Apps in the System Settings.
1. Open System Preferences (Big Sur or Monterey) or System Settings (Ventura). Open Security & Privacy (Big Sur or Monterey) or Privacy & Security (Ventura).
2. In Big Sur or Monterey, click the Privacy tab in the Security & Privacy window. Skip to step 3 if you are using Ventura.
3. For Big Sur and Monterey, select Full Disk Access on the left-hand side. For Ventura, select Full Disk Access on the right-hand side.
4. Click the + button.
5. Press and hold Command+Shift+G to open the Go to the folder prompt.
6. Enter in the following path in the Go to the folder prompt.
/Library/Sentinel/sentinel-agent.bundle/Contents/MacOS/
7. Click Go.
8. Select the following SentinelOne applications and click Open (hold the Command key to select multiple files at once).
- sentineld
- sentineld_helper
Approve Network Extension
1. If you see the System Extension Blocked message, click Open System Settings. (If you accidently click OK instead, the window closes. To approve the extension later, open System Preferences (or System Settings on Ventura) > Privacy & Security > General (Big Sur and Monterey) or Security (Ventura).
2. At System software from application "SentinelOne Extensions" was blocked from loading, click Allow.
3. In the window that opens, click Allow.